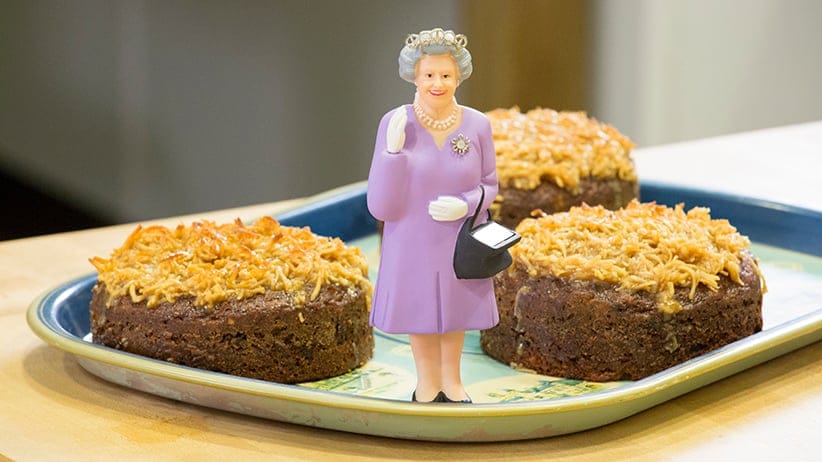
How to make Queen Elizabeth cake (Happy Birthday, Your Maj!)
For Queen Elizabeth II’s 90th birthday on April 21, it seemed only fitting to make the cake that bears her name. Though no one is 100 per cent sure whether the moist, date-filled cake is named after the Queen, or her mother, Queen Elizabeth the Queen Mother, it was a stalwart of family dinners and church bake sales in the 1950s. Chatelaine published a recipe for an elaborate version in time for parties to mark her coronation in 1953.
Yet, for me, that idea brought back some bad memories. Four years ago, I was in torment as cake after cake failed, so much so that the saga’s headline was "Making a Queen Elizabeth cake (well, on the sixth attempt.)" Even though I finally succeeded in baking a cake, I wasn’t confident that I could repeat it.
Then I met my cake saviour: Cheryl Pollock. A professional baker who sells her confections in Ottawa-area markets, Pollock makes a classic version of the cake that is simply irresistible. It’s easy to make and stays moist for days. Oh, and it freezes beautifully. By splitting the heavy batter into five small pans, she avoids the problem that plagued my early attempts using larger tins: the outside would be finished cooking well before the inside of the cake.
For Her Majesty’s big bash, Cheryl Pollock agreed to share her recipe (and tips) with Maclean’s.
Related:Canadians share their stories of meeting the Queen—now share yours
Queen Elizabeth cake
Date mixture
- 2 cups chopped dates (block dates are fine; pack them in!)
- 2 cups boiling water
- 2 tsp baking soda
In a bowl, mix the dates with the boiling water and let sit. After you finish the next step (beating the butter, sugar and eggs), then add the baking soda to the date mixture. Stir until combined and let sit until needed.
Wet ingredients
- 1/2 cup butter (room-temperature)
- 2 cups white sugar
- 2 eggs
1. Beat the butter, gradually add the sugar. Then add the eggs and beat some more.
2. Don’t forget to add the baking soda to the date-and-water mixture at this point!
Dry ingredients
- 3 cups flour
- 2 tsp baking powder
1. In a bowl, combine well. Add to the wet mixture and combine well. (The mixture will be slightly crumbly.)
2. Then, beat the date mixture into the main mixture until thoroughly combined. Don’t over mix.
3. Prepare five small round cake pans (either 5" or 6") by greasing the sides with butter, and then flouring the sides. Line the bottoms with parchment paper.
4. Pour the cake batter evenly into the five pans.
5. Bake for 40-45 minutes at 350 degrees F. (Depending on your oven, you may want to very, very carefully rotate the pans at the half-way mark of baking)
6. Remove from oven, place on wire racks and let them cool completely.
7. Remove from pans, discard the parchment paper. Place all five on a large cookie sheet (lined with parchment paper or use a Silpat for easy clean-up).
Only now do you prepare the topping (it’s optional, but very yummy).
Coconut topping
- 6 tbsp butter
- 10 tbsp brown sugar
- 4 tbsp milk or cream
- 1 cup unsweetened coconut (if you like coconut, then feel free to use another 1/2 cup or so
1. In a saucepan, combine all the ingredients and bring to a boil. Boil for three minutes, stirring constantly.
2. Remove from heat and spread evenly on the tops of the cakes
3. Set the oven to broil. Put cookie sheet with the topped cakes on it into the oven and broil for three minutes. Don’t take your eyes off the cakes. The minute the topping turns golden, remove the pan from the oven.
4. Cool on wire racks.
Makes five cakes.
Related Posts

Canada Can Be a Refuge for America’s Grad Students

How to Stop the Gen Z Slowdown

Canada’s Aging Infrastructure Is a Ticking Time-Bomb

Can Canada Survive Trump’s Attack on Science?
Get the Best of Maclean’s straight to your inbox.
Sign up for news, commentary and analysis. Join 60,000+ Canadian readers.